Thursday, March 28, 2013

Useful Photoshop Shortcuts

Simple Photoshop Shortcut Commands

  • H (Hand Tool) — When zoomed in to a portion of your photo, this command brings up the hand tool which allows for quick panning. Also, if the hand tool is active and you hold down the Ctrl key, you can zoom in without changing to the zoom tool. Likewise, if you hold down the Alt key, you can zoom out without changing tools.
  • Z (Zoom Tool) — This command just brings up the zoom tool, which allows you to zoom in. Like with the hand tool, if you hold down the Alt key, it temporarily switches to the zoom out mode.
  • Ctrl + 0 (Fit on Screen) — This is a quick-and-dirty command to get the entire photo in front of your eyes. That’s Ctrl + zero, not the letter “O”.
  • B (Brush Tool) — The brush is an extremely useful tool when working with masks, and I’m constantly using this command along with the hand and zoom tools.
  • Ctrl + Z (Undo) — Very useful for the little mistakes we all make.
  • Tab (Hide/Show Palettes) — Hiding the palettes gives you a little more working room, thus decreasing your need to pan and zoom while editing.
  • F (Cycle Screen Modes) — Switch between normal screen, full screen with task bar without title bar, and full screen with black background. Works great when used in conjunction with Tab to hide toolbars — maximum working space, no distractions.
  • X (Switch Colors) — Swap your foreground and background colors. Very handy when working with masks.
  • D (Default Colors) — Reset your foreground and background colors to black and white, respectively.
  • Ctrl + ‘+’/'-’ (Zoom In/Out) — Quickly zoom in or out without changing your current tool.
  • Alt + Mouse Scroll (Zoom In/Out) — Fastest way to zoom — scroll up to zoom in, and scroll down to zoom out.
  • Ctrl + Alt + Z (Step Back) — Ctrl + Z is OK if you catch a mistake immediately after it happens, but this command will continue to march its way up the history tree.
  • Ctrl + S (Save) — You should get in the habit of just hitting this combo on impulse about every 5 to 10 minutes. Also use Ctrl + Alt + Shift + S to bring up the save for web dialog.
  • Ctrl + Alt + Shift + N (New Layer No Dialog) — Quickly insert a new empty layer on top of the active layer. Get rid of the Alt key to bring up the new layer dialog for more options.

Intermediate Photoshop Shortcut Commands

  • [ (Decrease Brush Size) -- Quickly decrease your brush size to get into those tighter spots.
  • ] (Increase Brush Size) — Quickly increase your brush size for the larger areas.
  • Shift + [ (Decrease Brush Softness) -- Decrease the softness of the brush by 25%.
  • Shift + ] (Increase Brush Softness) — Increase the softness of the brush by 25%.
  • 1->0 (Tool Opacity) — I usually run my brush opacity around 5% or 10%, but some things require a bit more opacity. Just press one of the numbers from 1 to 0 and your tool opacity will change from 10% up to 100%. If you want finer control, press a second number quickly after the first, and you can get any percentage you want. So pressing 4 will get you 40% opacity, while pressing 4 then 3 will give you 43% opacity.
  • Shift + 1->0 (Tool Flow) — This works exactly like the opacity changer, but you just have to hold the Shift key down while you hit the numbers.
  • Ctrl + Tab (Next Point on Curves Adjustment) — When using the curves adjustment dialog, you can place multiple points on the curve and adjust them accordingly. Sometimes you want to make very minor shifts in those points by nudging with the keyboard, but clicking on the point to activate it usually moves it to an undesired location. Use this command to switch focus from point to point without moving them around.
  • Shift + Click Mask (Enable/Disable Layer Mask) — When working with masks it’s typically done in small increments. Disabling the mask allows you to check the results of your masking against the original.
  • Alt + Click Mask (Toggle Mask Visibility) — Doing this will bring up the mask as a grayscale image so you can see what you’re working with. Useful if you have areas that need to be filled in or smoothed out.
  • Ctrl + Click Mask (Load Mask As Selection) — Selects the white part of the mask (grays are partially selected). Useful if you want to duplicate a mask or it’s inverse. Using Ctrl + Click on a layer without a mask will select the non-transparent pixels in that layer.
  • Ctrl + J (New Layer Via Copy) — Can be used to duplicate the active layer into a new layer. If a selection is made, this command will only copy the selected area into the new layer.
  • Caps Lock (Toggle Cross Hairs) — Switch between the standard tool icon and a set of precision cross hairs. Useful for spot-on selections.
  • Shift + Backspace (Fill Dialog) — Good time saver when working with masks. Also, use the Ctrl + Backspace to fill with background color and Alt + Backspace to fill with foreground color.
  • Ctrl + H (Hide Selection Lines) — When working with selections, use this command to hide the “marching ants” while keeping the selection.
  • Ctrl + I (Invert Selection) — Select the opposite of what is already selected. Also a good tool when working with mask creation.
  • Ctrl + D (Deselect) — After working with your selection, use this combo to discard it.
  • Side Note: When working with selections, they can be applied to a layer as a mask simply by adding a new layer mask using the little box-with-a-circle-inside icon at the bottom of the layer palette. This also works with adjustment layers by automatically applying the selection to the mask.

Advanced Photoshop Shortcut Commands

  • Ctrl + Shift + N (New Layer) — This will bring up the new layer dialog box and place a new layer on top of the active layer.
  • Ctrl + Alt + Shift + N (New Layer No Dialog) — This command skips the dialog box and just places a new layer on top of the active layer.
  • Ctrl + Shift + C (Copy Merged) — This works basically like the copy command, except you get a merged copy of the composite image sent to the clipboard. This command only works if you’ve made a selection on the image first (use Ctrl+A to select all), otherwise you’ll get a copy of nothing. This is useful if you want to duplicate what you see on the screen into another image file or even another layer.
  • Ctrl + Alt + Shift + E (Stamp Visible) — This is actually one of my favorite commands. First, I’ll create a new empty layer on top of the stack. Then I’ll select that new layer and use this command. It does basically the same thing as the copy merged command, except it places the copy right into the new layer. I use this for creating layer blends, sharpening, and any other type of editing that can’t be done non-destructively.
  • Ctrl + Alt + Shift + K (Show Keyboard Commands) — If you forget any of these commands, or if you want to check on other commands, use this to bring up the help dialog on keyboard shortcuts.

Handy Photoshop Shortcut Commands

  • Ctrl + G (Group Layers) — This command groups selected layers in the layer tree. Adding Shift to this combo will ungroup layers when the grouped layer is selected.
  • Ctrl + A (Select All) — Creates a selection around the entire canvas.
  • Ctrl + T (Free Transform) — Brings up the free transform tool for resizing, rotating, and skewing the image using a dragable outline.
  • Ctrl + E (Merge Layers) — Merges selected layer with the layer directly below it. If multiple layers are selected, only those will be merged.
  • Crtl + Shift + E (Merge Visible) — Merges all visible layers into one. Not recommended practice in typical photo editing because you’ll lose layer information.
  • Ctrl + Alt + E (Stamp Down) — Merges all selected layers into one new layer. Add the Shift modifier to this combo and you’ll get a new layer containing a merged representation of all visible layers (handy for sharpening adjustments)
  • Ctrl + Alt + Shift + R (Rotate Arbitrary Dialog) — bring up the rotate dialog to straighten out your horizon… but it’s not typically used since we all take perfect photos, right?
  • Side Note: Adobe Camera Raw (ACR) has the ability to straighten photos before they ever make it into Photoshop. When straightening, you draw a line you’d like as your horizontal and ACR will take care of the rotation and crop for you.
  • CTRL + ALT + DEL (Kill Photoshop) — Quite useful when Photoshop takes your computer hostage. Must have used the Ctrl + S command prior to the hostile takeover in order to prevent mental breakdown.

 Source : http://digital-photography-school.com/28-more-exceptionally-useful-photoshop-shortcuts


Hints & Tips on doing Group Photoshot

  • Tell the group that the session will go more smoothly, quickly, and get better results with their co-operation.
  • Get the whole group to look in the same direction by giving them a point to look at. The maker's name of your camera is a good one.
  • Make the session as light-hearted as you can without resorting to telling long and rambling stories.
  • Informal groups often look good when shout from about thirty degrees above their eye-line, so consider bringing a step-ladder.
  • Everybody blinks. The larger the group, the more certain it is that somebody will have their eyes closed as the shutter opens. Tell your group this and use it as a reason to take a large number of pictures.
  • The "noise" associated with digital cameras at high ISO settings will show up really badly in large group photographs, so try to shoot at you camera's best quality settings.
  • It is always tempting to shoot large groups with wide-angle lenses. Be aware that the distortion associated with even the best quality lenses do strange things in the corner of the frame, so try to get a bit further back than you would think necessary.
  • Try to end with a few "fun" frames so that the session ends on a high note.
Source : Michael Freeman - Mastering Digital Photography Book


Examples of group photo


67 ESSENTIAL Wedding Photography Tips

68 ESSENTIAL Wedding Photography Tips
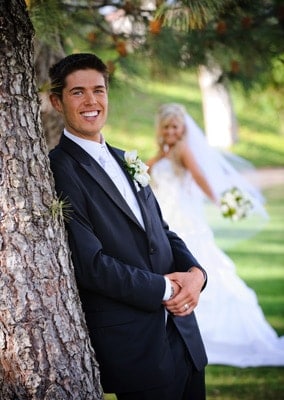
Groom looking at camera for a wedding photo
It's wedding time!
This is the largest collection of wedding photography tips to ever be assembled on one page of the Internet.  My hands hurt from typing it, but you can help to ease my pain by sharing this on Facebook and Pinterest after you’re done gorging yourself on these wedding photography tips.

Wedding Photography Tip #1: Wear comfy shoes
You’re going to walk like you wouldn’t believe as a wedding photographer on a wedding day.  Sure, the Stilettos might look good at the wedding reception, but you’ll be the grumpiest wedding photographer on the planet.

Wedding Photography Tip #2: Take out Uncle Bob early with a sharp elbow to the stomach!
It’s funny, but I have seen “Uncle Bob” ruin more wedding photos than you could possibly believe.  What I mean by this is that there will (almost) always be someone in the wedding party who likes to get in the way.  They either tell people how to pose while you’re trying to get everyone in the right spot, or they step in front of you to take pictures, etc.  The wedding photographer must be CONFIDENT and take charge.  Simply saying something like “Thanks for your help.  I’m trying to do something a little different here.  Is it all right with you if I go ahead and get the posing set up here?”  It might seem forward, but your couple will be glad to see you moving quickly and getting the photos done correctly.  (Thanks Julie Gallagher)

Wedding Photography Tip #3: Have a frank talk about seeing the bride
Some couples are very serious about the tradition of the groom not seeing the bride before the wedding day.  I like to sit couples down and explain that I really NEED at least an hour just with the couple (nobody else in the wedding party) in order to get a decent album together.  Once they realize that they need to commit to this much time and see they can’t fit it in the wedding day plans, they are usually open to doing a shoot the day before the wedding all dressed up.  It gives the bride a chance to try her hair and makeup out, and you’ll have unlimited time with the couple to nail the wedding photos.
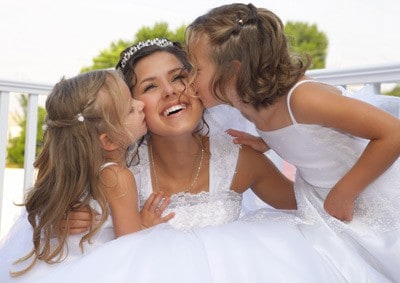
Two little girls kissing a bride on her wedding day
Don't miss the bride with her siblings--including the little ones!

Wedding Photography Tip #4: Avoid the number one complaint of brides about the photographer
More than any other complaint I hear from brides is that the photographer missed getting a certain photo (such as the bride with her high school roommate, her little sister in the pink dress, etc).  The best way to avoid this is to simply meet with the bride before the wedding and have her create a shoot list.  You can even bring some sample photos (perhaps on an iPad?) to the meeting and have her select a few poses she really wants.  Write down the bride’s shot list and mark each one off on wedding day.  I usually end up with about 15 “must have” shots.
By doing it this way, the bride takes ownership over what “must have” shots are taken, so no vital shots are missed.  (Thanks Rozane Fulton)

Wedding Photography Tip #5: Change lenses for changed expressions
If you notice that you aren’t getting the bride and groom to relax and interact with each other while you’re taking photos, the best thing you can do is to switch to a longer lens (like 200mm) and scoot way back.  The couple will naturally begin to interact with each other and you’ll be able to get the shot since you’re out of their way.  This is my favorite way to START a wedding shoot of the couple.  By starting far away, they feel like it’s just them and they can get used to the camera from a distance.

Wedding Photography Tip #6: Get the names!
When you meet with your bride to get your shoot list, ask for the name and cell phone number of the maid of honor and the best man.  They are usually part of the planning and are important people to be able to call by their first name during the event.

Wedding Photography Tip #7: Guess What!  Wedding dresses are white.
Yep, it’s true… and it has been true for over 150 years.  If you want the dress to stay white instead of a dull gray, then you’ll probably need to dial in some positive exposure compensation.  The light meter in your camera will see the white dress and think it’s bright, but it isn’t bright–it’s just white!  The camera tends to compensate for this large “bright” spot in the photo and makes the exposure of the dress too dark.  Positive exposure compensation fixes this problem in a jiffy (Thanks Jess Joey)
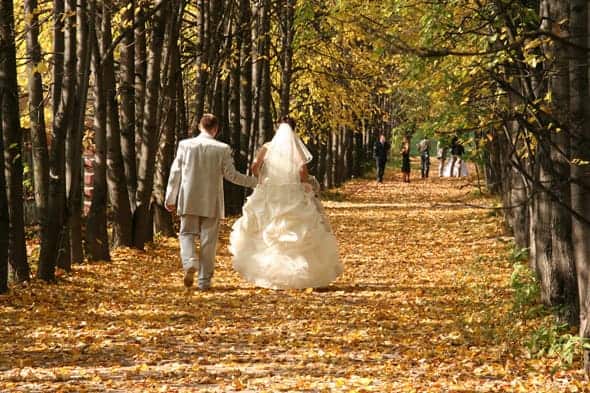
AWESOME location, isn't it?

Wedding Photography Tip #8:  Rent a second body for wedding insurance
I have personally experienced the horror of a critical equipment failure while shooting a high-dollar event.  It is a sickening feeling to see “ERR:99″ on the LCD.  Fortunately, you can rent a second camera body from Borrowlenses.com for next to nothing.  The small price of renting a camera for the wedding is a huge benefit.

Wedding Photography Tip #9: Rent a second body or lens for speed!
Not only is it handy to have two camera bodies for a wedding as insurance against gear failure, but it also enables you to have a different lens on each body.  This way you can very quickly switch from telephoto to standard zoom as the wedding party moves around.  Once you’ve tried it, you’ll never go back to shooting just one body.  Fortunately, you can rent the lens and camera body for cheap.  (Thanks Kati Lewis)
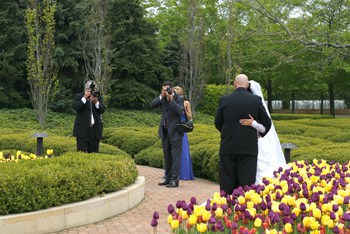
Getting two photographers for a wedding makes a big difference in how the day works out!

Wedding Photography Tip #10: Get a second shooter
Most new wedding photographers skip hiring a “second shooter” to back them up on wedding days.  If you can possibly make it happen financially, it is definitely worth the money to hire another photographer to work with on the wedding day.  The photos will be better, you’ll have a second set of gear in case of disaster, and you’re extremely unlikely to miss the shot.  (Thanks Gabrielle Walker-Jones)

Wedding Photography Tip #11:  There is an easy (and cheap!) way to hire a second shooter
Email a few local photographers who may be starting out and ask them if they would like to trade services for each other.  You shoot second for them, and they can shoot second for you.

Wedding Photography Tip #12:  Don’t run out of juice
Your batteries–not punch.  One battery is unlikely to make it through the day.  Head over to Amazon.com and spend $20 to get another battery for your camera.  If nothing else, it’s peace of mind!   (Thanks Gaelene Gangel)

Wedding Photography Tip #13: Don’t run out of memory
When shooting a wedding, I like to use a camera with dual card slots (like the Nikon D7000, or many high-end cameras) because it allows me to double up on each photo.   Every photo is recorded to both cards.  This is good insurance, but it also uses a lot of memory cards during a wedding.  I’d never shoot a wedding with fewer than 30 gigs of memory cards in my bag.  I almost never shoot that many shots, but I never want to face the situation where I’m panicking about running out.  (Thanks Robert LeBlanc, who is a regular on the Facebook page)

Wedding Photography Tip #14: Don’t miss the bride and her siblings, and the groom and his siblings
This is often one of the most treasured photos from any wedding, so don’t miss it! (Thanks Barb Siddiqui)

Wedding Photography Tip#15: Don’t try too hard
Just be yourself and be personable.  Most people will like you just fine if you’re yourself.  (Thanks Butter Salleh)
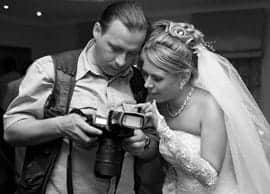
Be sure to communicate well with the bride!

Wedding Photography Tip #16: Get out of the way
Wedding couples want a photographer who is personable and cheerful, but the day is about THEM and not you.  Make the photography a fun part of the wedding, but be invisible wherever possible.  This is especially true during the ceremony and during the toast.  Give them some space and throw on a longer lens for these moments.  (Thanks Lisa Parker)

Wedding Photography Tip #17: Don’t miss the details!
Take a photo of the bride’s ring sitting on the preacher’s Bible, a picture of the buttons on the bride’s dress, a picture of the cake topper, etc.  The bride has spent months preparing every tiny little detail, and she will appreciate photos of each of those things.  I usually like to take photos of the details while the reception hall is being set up because the lights are turned on and it’s easier to get the shot.  (Thanks Kimberly Perry)
Don't miss individual shots of the groom, either!

Wedding Photography Tip #18: Be clear about what is included
You don’t want to be in the position as the wedding photographer of needing to fight the client after the fact (or during!) with what they have and have not paid for.  Before the event, clearly communicate to them what services you are prepared to offer for the price they pay.  Do you include digital files?  How many hours of work will you shoot?  Are you going to shoot the reception too?  Is there a travel charge?  What prints are included?  Will you do an album?  Provide answers or face the wrath of bridezilla. (Thanks Gaelene Gangel)

Wedding Photography Tip #19: SLOW DOWN!
I often here new wedding photographers brag about shooting over 2,000 photos during a wedding.  Every shooter has a different style, but I personally don’t see good results when I do this.  I usually do my best work when I walk away with fewer shots because it means that I worked methodically and slowly.

Wedding Photography Tip #20: Shoot landscape at the venue before the event
The wedding couple has chosen the venue because they like it.  Show up early to the event and take some nice shots of the venue to include in the wedding album.  Little things can make a big difference.  Also, you can chose to share your photos with the venue owner and you might get some referrals! (Thanks Tom Pickering, who is a regular on the site and frequently comments)

Wedding Photography Tip #21:  If you are taking the photos of the bride and groom on the wedding day, plan on half the time allotted.
Weddings always run late.  Always.  It’s as sure as the fact that Uncle Bob will annoy the photographer.  If the bride says they’ll have an hour to do a shoot with you, immediately translate that sentence into half an hour.  Your time to work alone with the bride and groom is precious, so you need to be confident that you can get the shot in only 30 minutes with many weddings. (Thanks Meagan Thompson)

Wedding Photography Tip #22: Plan which family will arrive first
Nothing is worse than one photographer trying to conduct two large families for photos.  I like to plan a time for the bride’s family to be there, and shoot their photos, then I’ll have the groom’s family come to shoot everyone together, then I ask the bride’s family to leave while I shoot the groom’s family.  Works like a charm.  The last thing you want is for people to be standing around waiting on you. (Thanks Michaelle Parsons Mulhollan)

Wedding Photography Tip #23: Have the bride appoint a go-to helper
Have the couple appoint you someone that knows all the ‘key players’  as your go-to person for questions. Especially helpful during the formal family shots since the bride and groom are in all the shots. They can help point out that uncle or go get grandma from the reception (cause she always manages to leave first to get over there LoL). They are also helpful during the reception to ask questions when you don’t want to bother the new couple. (Thanks Melinda Lutz Ledsome)

Wedding Photography Tip #24: Sticky tape saves the day
Take sticky tape to turn up the groom’s long pants if they are too long and in a puddle round his feet. Turn them up (underneath) and stick down for a better, tailored look.  The tailors at rental tux places always do such a crummy job that the stitching frequently comes out during the day. (Thanks Eleanor Muller)

Wedding Photography Tip #25: Watch for the little, unexpected moments
Always capture the the moments that are unexpected. beyond what is expected. brides love it when you photographed her sharing a special moment with her parents or a special moment with her new husband. (Thanks Ash Gongora)

Two kids dancing at a wedding
Kids dancing at a wedding

Wedding Photography Tip #26: Let the kids be kids and you’ll be glad you did
Let the kids be kids! Some of the best shots of weddings I’ve seen are when kids are doing adorable things rather than being posed. (Thanks Charlotte Walker)

Wedding Photography Tip #27: Think of it as YOUR wedding
Think of it as your own wedding–what would YOU want captured…capture that and more. (Thanks Alexandria Wilcox)

Wedding Photography Tip #28: Bring a white sheet
Photographers often want the bride and groom to stand in flower beds, near water, and in other unexpected places.  Brides don’t like to do it because they are worried about their dress getting dirty on the wedding day.  A simple fix is for the photographer to bring a white sheet that the bride can step on to protect the dress.  The sheet is then tucked under the dress and nobody knows!  (Thanks Stacey Knight)

Wedding Photography Tip #29: Stay calm if you want the bride to be calm
Very few things could occur on a wedding day than for the bride to see that the photographer is frazzled and appears not to know what he or she is doing.  It doesn’t show much confidence, and you’re likely to make everyone feel uncomfortable and unhappy if you don’t take charge and get things done.  (Thanks Derek Hill)

Wedding Photography Tip #30: Use the environment around the nuptials to the fullest!
I’m a huge fan of “framing” in weddings. Shooting through a crowd and having the only thing in focus be the bride and groom makes the viewers feel like they are a part of the action every time they look at it. Shooting through glass, using architecture to frame, people, nature, etc etc. It gives you a super dreamy and romantic look. (Thanks Mandy Drake)

Wedding Photography Tip #31: Get up close during the ceremony
During the ceremony stand or squat up by the bride and groom to ensure you get the best picture you can of kiss, rings, etc. (I said sqaut so others can still see.) And do the “new couple” photo between the ceremony and the reception.  (Thanks Elizabeth Smock)
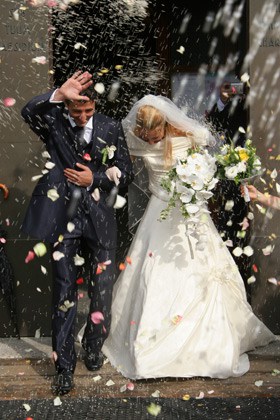
PERFECT action shot for a wedding

Wedding Photography Tip #32: Talk with the pastor first!
Different churches have different policies about shooting in the church.  Some churches don’t allow flash photography.  Some churches have restrictions on where the photographer can be during the ceremony, etc.  Ask so you don’t ruffle feathers.  (Thanks Ed Cord, who is a regular on the Facebook page)

Wedding Photography Tip #33: Learn to work with natural light
Remember to pay attention to shadows on faces when using natural light. (Thanks David Vela)

Wedding Photography Tip #34: Have a contract
So many things can go wrong in a wedding and with wedding photography.  Have a contract to protect you from lawsuits and to clearly set out expectations the couple should have for you.  (Thanks Ed Cord)

Wedding Photography Tip #35: Get a timeline for the reception
It can be easy for the photographer to miss the cake cutting, bouquet throwing, etc.  While photographers are usually good about setting out a schedule with brides for the big things like when the bride/groom photos will be taken, they often forget to work with the bride about when these things will be so they aren’t missed.  This is especially true if you’re shooting solo.  (Thanks Ed Cord, who is a regular on the Facebook page)

Wedding Photography Tip #36: Grand view, or tight crop?
When talking to the potential client, find out right off the bat if they like grand scope views or detailed views best. It really helps make the right choice in a pinch when shooting the event. (Thanks Elizabeth Crocker)

Wedding Photography Tip #37: Bring an emergency wedding kit
Bring an emergency kit with the standard items (pins, tape, stain remover, etc. and also a classy, wooden hanger for the dress shot.  (Thanks Chris McCooey)

Wedding Photography Tip #38: The OTHER three little words
Ask the bride and groom for just three words to describe their vision of the day, then keep those words in mind as you capture it! If they say “fun”, take every opportunity to “document” a fun moment. If they say “romantic”, keep lighting in mind and snap every sweet moment the newlyweds share that day/night. Yes, you are the photographer, but it is THEIR day. Make your art reflect that! (Thanks Matthew Michaels)

Wedding Photography Tip #39: Don’t let religious differences impact your work
The type of wedding ceremony that you are used to may be completely different in other faiths.  Sometimes photographers get thrown by this and it can affect the photos.  For example, photographers who shoot an LDS wedding shouldn’t be surprised that you can’t photograph the actual ceremony at all!  Photographers who shoot inside a cathedral shouldn’t be surprised if you can’t use flash.  Photographers at a Jewish wedding need to know not to miss the bride breaking the glass.  All religions do things differently and you should be familiar with how the wedding goes, and respect the religious differences (Thanks Rebecca Birrell)

Wedding Photography Tip #40: Pay attention to which kids are whose!
Sheryl Turner wrote in “if the children in the wedding aren’t the children of the couple getting married there are no need for a million pics of them doing silly things. I have tons of pictures of our ring bearers who are our cousins. The pictures are cute but I would rather if she took more pics of the ceremony. Which I barely have any.”
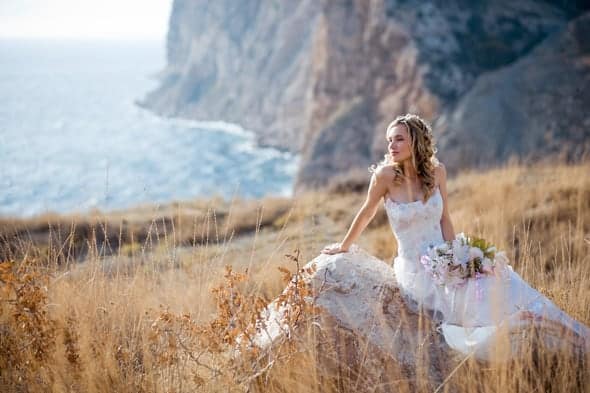
Bridals are SOO much fun to shoot!

Wedding Photography Tip #41: Skip the bridals and perish!
It is amazing to me how many photographers get so caught up in the details of shooting a wedding that they don’t take any bridals!  Many photographers like to shoot the bride on a day other than the wedding so they have enough time with her.  (Thanks Sheryl Turner)

Wedding Photography Tip #42: Visit the venue before the day
If possible scope the place out before the wedding that way you know what angles you can get and where you need to be to get the best view. (Kimberly Swaim-Vaughn)

Wedding Photography Tip #43: Tell the bridesmaids to SMILE while the walk down the aisle
Before the ceremony make sure to tell the bridesmaids to SMILE when they are walking down the aisle. You have no idea how many weddings I have shot where the bridesmaids are looking down at the ground and are looking sad. Sometimes they just forget and don’t realize they are being photographed. Remind them! (Thanks Meagan Kunert)

Wedding Photography Tip #44: Attend the rehearsal.
Enough said.  Do it.  (Thanks Laura Anderson)

Wedding Photography Tip #45:  Move it!
The reason wedding photography is the very hardest type of paid photography is because you have no time to mess with the camera.  It takes experience and skill to know that you have all the technical stuff done right so you can hurry through the event and not miss the shot while you’re doing it.

Wedding Photography Tip #46: Bring a few props
Depending on what style you shoot and the couple prefers, bringing a few props like ring boxes, a large empty picture frame, and  nice hanger for the dress, can make a big difference.  Not only will it help you to get great shots, but it will show the couple that you put some forethought into the event.
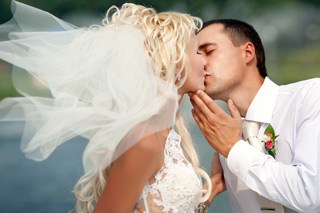
Kiss slowly!

Wedding Photography Tip #47: Kiss SLOOOooowly
No need to encourage a mid-wedding make out, but generally kisses are too short for the photographer to get a few pictures of kissing poses.  Instruct them to kiss slooowly.  They won’t mind :-)  (Thanks Jason Craven)

Wedding Photography Tip #48: Get the fathers shot
Vickie Hanson said, “One of my favorite wedding pictures is of my father and new father in law, standing outside of the church after the ceremony, tuxedo coats off, smoking a cigarette. It was such a natural thing for them and they were so relieved to relax that the picture is perfect!” (Thanks Vickie Hanson)

Wedding Photography Tip #49: Ask the bride
Ask the bride what part of her dress she likes the most.  Maybe its the train, maybe its the veil.  Ask her so you can be sure to get the shots of what attracted her to the dress. (Thanks Lyndsey DeSantis, who is a regular on the Facebook page)

Wedding Photography Tip #50: Know your lighting situation
If you visit the location at the same time of day when you’ll be shooting, you’ll be able to see what the light is like so you’ll know what lighting gear you need at each stage of the wedding.  Preparation is key.

Wedding Photography Tip #51: Quiet shutter!
Some cameras are equipped with a quiet shutter setting.  You don’t want to fire off 10 frames per second like a machine gun during the “I do” part.  Selecting quiet shutter can make the difference.

Wedding Photography Tip #52: Bring a tripod
Portrait photographers usually don’t work from a tripod when shooting on-location, but it can be especially useful for shooting inside a dimly lit church.  Bring a tripod for these situations so you can get a sharp shot even with a slower shutter speed.  Even if you can get away with shooting handheld inside, you might want the tripod so you can use a lower ISO and get cleaner shots. (Thanks Johnny Quattlebaum)

Wedding Photography Tip #53: Shoot the wedding party in black and white
There is something about black and white that gives wedding photos a very classy look and feel.  I find that most shots of the reception look better in black and white.  You’ll obviously want to talk with the couple about what photos they like in color, but don’t skip out on the opportunity to use black and white.

Wedding Photography Tip #54: Don’t miss the train!
Julieanna Crynn-Goblyn said, “My wedding photographer didn’t get a picture of the train on my dress. 16 years later I’m still annoyed.”
Don't miss the train!

Wedding Photography Tip #55: Be spontaneous as the photographer
While you need to be organized and prepared to shoot a wedding, you also can get a lot of great shots by being spontaneous and seizing shot opportunities as the ideas come to your mind.  (Thanks Tracy Collyer)

Wedding Photography Tip #56: Invest in a flash bracket
Invest in a off camera flash bracket (stroboframe) they are expensive but will make your photos 10 times better (controlling shadow). (Thanks Eric Breault, who is a regular on the Facebook page)

Wedding Photography Tip #57: Seize the perfect moment to relax
Allow yourself a moment to relax when everyone is eating (no one wants photos of that anyway. lol). Maybe look through some of the photos on your camera and delete some really bad ones to make room on your memory card. (Thanks Hannah Vollette-Weymouth, who is a regular on the Facebook page)
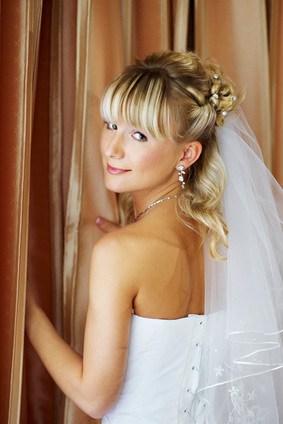
Creative posing for wedding photography

Wedding Photography Tip #58: Look around for not-so-obvious angles
MOVE if you can. Walk around and take shots from various angles.   Walk upstairs and shoot down on the wedding party.  During the 1st dance, I walked a circle around the couple. Far away, at first, then moving a little closer on the second circle. It was an incredible effect. But, it is also good for other shots. (Thanks Melody Landrum)

Wedding Photography Tip #59: Take fun photos too!
Take fun photos. It doesn’t have to be all serious. Laughter is a wonderful memory. The last one I did was pretty casual. I had the groomsmen and the groom climb a tree and took a wonderful shot. We also did the infamous Charlie’s Angel shot of the bride and her bridesmaids. (Thanks Melody Landrum)

Wedding Photography Tip #60: The one question that is worth more than $5,000 worth of advertising
When you deliver the photos to the bride and she’s thrilled with your work, ask “Who else do you know who might need a photographer?”

Wedding Photography Tip #61: Bring a ladder or step stool
Bringing a step stool with 3 steps or a short ladder can make a big difference in how the group photos turn out, and you’ll also be able to use it for creative shots of the couple throughout the day.  (Thanks James Mathis II)

Wedding Photography Tip #62: Dress appropriately
Know ahead of time how formal the wedding will be, and how you fit into the event.  Some wedding photographers, like David Ziser, like to wear a suit to every wedding.  Other photographers think it is perfectly appropriate to wear slacks and a shirt.  Some female photographers wear a dress, and others wear jeans and a nice polo.  I wouldn’t say that there is one right answer here, but it is worth thinking about beforehand.

Wedding Photography Tip #63: Know the PERFECT recipe for natural light success
Since few of your sessions are during the “golden hours” try a solo shot of the bride backlit by the sun. The veil and dress will glow. You’ll need some fill light to bring the detail back into her face. (Thanks Craig Larson)

Wedding Photography Tip #64: Don’t forget to include elderly family members
A young B&G may not be thinking of the eldest of their family elders in their youthful exuberance, but may appreciate a photo that includes them as time goes on. (Thanks Carole Krezman)

Wedding Photography Tip #65: Manage the family snap shooters
By taking a pause now and then to say “I’m going to break for 2 minutes for family members who want to take snap shots with your cameras,” people clue in that there is a time for them to shoot, and a time when you need them out of the way.  It doesn’t add much time, and the cooperation of the snappers is worth it. (Thanks Paul Beggs)

Wedding Photography Tip #66: Tell the bride to hold the flowers lower than what feels comfortable.  It will look better in the photo.
Tell the bride and bridesmaids to hold the flowers at belly button level. Otherwise they tend to hold them too high!! (Thanks Michelle Bartholic)

Wedding Photography Tip #67: Give a quick turn-around
I am a total hypocrite of this one, but getting the photos back to the couple soon after the honeymoon shows you’re on the ball and care about their photos.

Source : improvephotography.com

Photography Basics #5: Capture clear photos

Photography Basics #5: Capture clear photos

In the previous installment of this photography basics series, I taught about composition.  In this installment, I’ll teach you all about focus and why your photos may not be as sharp as you’d like them to be.
This morning, I got an email from one of the students in my online beginner photography class who said she spent $2,000 on an expensive camera and another $1,500 on a high-end lens.  Still, her pictures don’t look as sharp as she would like them to, and wondered why that is.  I have to admit that I get this type of question SOO OFTEN that I dedicated an entire WEEK of training in my beginner class to teaching about how to get crystal clear and sharp photos.
It is not uncommon for photographers to think that something must be wrong with their equipment if the photos don’t come out sharp, but most of the time I find that the reason is simply a product of mistakes the photographer makes when shooting.  You can avoid those issues by understanding how to properly focus your camera.

The #1 focusing mistake of beginning photographers

The #1 mistake I see from beginning photographers in terms of getting clear pictures, is that they aren’t being precise with their focus.  I often ask students where they are focusing, and I get answers like, “On the model’s face.”  The fact of the matter is that “the face” is far too large of an area to focus on for intimate portraits.  Allow me to explain why…
Suppose you’re taking a portrait of someone.  Now that you’ve learned how to use shallow depth-of-field from the second article in this series, you want to use it all the time in your portraits to get a creamy background behind the subject.  This means you’re usually shooting your portraits at f/2.8 or a similar low aperture.  Suppose, also, that you’re using a 100mm lens and standing 7 feet (2.1 meters) from the subject.  Did you know that, with these settings, that only 1.4 inches (3.5 centimeters) of the photo sharp?  That means that, if you focus on the person’s cheek, their eyes and nose will be partially blurry.
So if you want your photos to come out crystal clear and sharp, you need to focus PRECISELY, and make sure you have enough depth-of-field to make the subject come out sharp.  When shooting portraits, you will almost always focus on the person’s eye, since that is where the viewer of the photo will look first.  For landscape photographers, check out this article on where to focus in landscape photography.

How to focus on one spot

When you were shooting in automatic mode on your camera, the camera would automatically find the subject and focus for you.  Now that you’re shooting manually, it’s time to take control of your focus as well.
Your camera ALWAYS focuses on one specific spot in the scene.  It is physically impossible for a lens to focus on two spots at once.  When you look through your viewfinder, you see a bunch of dots (Canon) or small boxes (Nikon).  Those markings show you where in the frame the camera is focusing.  This spot generally blinks red when the camera sets focus.
In the picture below, I chose to focus on the ant on the flower, since that is where I wanted people to look.  To do this, I set the camera to spot focus and used the four-way selector on the back of my DSLR to move the focus point onto the ant.
Notice the red illuminated focus point right on the ant? That’s where I’m setting the focus for this shot.
Sometimes, the spot in the picture where you want to focus will not have a focus point available.  This is especially true on entry-level Canon Rebel or Nikon D3200 DSLRs, which do not have many focus points.  If you find that this is the case, check out this article on focusing and recomposing.

Focus Selections

I hope I didn’t confuse you earlier when I said that the camera can ONLY focus on one specific spot in the photo.  There are ways that you can activate multiple focus points at once, but in doing so, the camera is just choosing the best of both worlds and compromising between the focus selections to set the focus in the middle somewhere.
99% of the time when I’m out shooting I use spot focus, which allows me to move around the focus point in the viewfinder.  My thumb has become adept at constantly moving around the focus point using the four-way selector on the back of the camera as I compose a shot through the viewfinder.  Spot focus is great because you have exact control over where the focus is placed.
However, there are other focus selection options on most DSLR cameras.  Other than spot focus, you have the ability to choose a small group of between 3 and 5 focus points and tell the camera to choose the best of those points, or you could set your camera to determine which focus point to use all on its own.  I never let the camera take control of focus–it’s a recipe for blurry pictures.  When I’m shooting sports or fast-moving wildlife, I’ll sometimes set the camera to use any of the center area focus points and choose the best one, because the action happens faster than I can move the focus point.
Although there are certainly situations to use other focus selections, I would encourage you to use spot focus and get used to constantly moving around the focus point around the frame as you shoot for the next few months.

Focus Modes

Aside from selecting which focus point(s) the camera is using, you also need to set which type of autofocus the camera will use.  For most uses, you’ll want to leave your camera on “AF-S” (Nikon) or “One Shot” (Canon).  This means that the camera will acquire focus when you press half-way down on the shutter button, and then take the picture when you finish pressing all the way down on the shutter button.
The other main option is continuous focus (displayed on the camera as “AF-C” for Nikon cameras and “AI Servo” for Canon cameras).  This mode is used when the subject is moving.  Suppose you’re shooting a soccer player running toward you.  If you use one shot, then the camera focuses when you press half way down on the shutter, and by the time you finish pressing all the way down, the camera takes the picture.  In that split second, the athlete will have moved, so the picture will not turn out sharp.  Continuous focus (AF-C or AI SERVO) means that the camera continues to find focus all the way up to the instant that you snap the picture.
So why wouldn’t you want to use continuous focus all the time?  Because it’s slightly less precise than one shot.  So here’s the rule… use one shot (“AF-S” on Nikon, and “One Shot” on Canon) for all shots where the subject is reasonably still like landscapes or most portraits.  Use continuous focus (“AF-C” on Nikon, and “AI Servo” on Canon) for all fast-moving shots.
Note: Canon users will also see the option for “AI Focus” when choosing a focus mode.  There is a specific use for this, but honestly it’s just outdated technology.  I have tried it extensively even in the best case scenarios for this focus mode and have always achieved better results with AI Servo.

Source : imrovephotography-basic#5

Photography Basics #4: Creative Composition

Photography Basics #4: Creative Composition

Later in part 3 of this photography basics series, I taught you how to shoot in aperture priority and manual mode on your camera.  In this installment, I’m going to teach you how to develop strong compositions in your photos.
Here’s the thing about composition.  There are a few basic rules of composition that you’ll easily understand from this article, but you’ll soon see as you get out and practice photography that finding a strong composition is a process of trial-and-error which you’ll only learn with time and practice.
Simply put, composition means meticulously selecting what elements will appear in the picture, and then carefully placing those elements in the frame to create a creative, balanced, and interesting organization.
Jim Harmer (yep--that's me)

Composition Example

Ever had a driver’s license photo taken?  Or a mug shot?  Hopefully not the mug shot, but we all know how horrendous those photos look.  You can look your absolute best when you get to the driver’s license place, but the photo always makes you look terrible.  Why?  Because they position you in the middle of the frame, and then make you square off your shoulders to the camera.
From the photo below, you can see a humorous example of how photographers often envision a picture, and what the camera actually captures.  It’s funny, but unless you start paying attention to your composition, your pictures will always look like mugshots.
Driver’s license photos always look terrible because they pose you in the middle of the photo and make you square off to the camera.

The Rule of Thirds

Imagine a tic-tac-toe board placed on your picture.  The rule of thirds says that you should place whatever is most interesting or eye-catching in the photo on the intersection of the lines on the photo.  That’s really all there is to it!
If you’re shooting a portrait, decide which eye of the model is the focal point of the image.  Usually, it’s the eye closest to the camera.  Then, adjust the framing of the picture until the eye is on the intersection of the imaginary tic-tac-toe board.  Bingo!  You followed the rule of thirds.
The same is true when shooting a landscape.  In many or most landscapes, we like to include some of the foreground up close to the camera so as to give the sweeping landscape a sense of depth.  So if there is an interesting rock or plant in the foreground, I’ll place it on the bottom-right or bottom-left intersection of the frame.  The same is true without a foreground element.  You can place the horizon on the top or bottom third-line so that the horizon doesn’t cut the picture in half.

The REAL Rule of Composition

Ask most amateur photographers in the world what composition is, and 90% of them would answer something like “The rule of thirds and leading lines.”  Those are certainly important principles to follow, but I have found that these basic principles are far too simplistic.
When I go out and shoot, I usually find that trial-and-error is the only way to get strong compositions.  I loosely follow the rule of thirds and other compositional principles, but mostly it’s about getting down low and shooting up, or finding something to stand on to shoot down, or moving my tripod an inch here an an inch there, and really playing around until everything in the picture looks balanced and solid.  Don’t over-analyze the rules.
In the next lesson of this Photography Basics series, I’m going to talk about proper focusing techniques.

Source : improvephotography-basic#4

Photography Basics #3: Master Your Camera’s Shooting Modes

Photography Basics #3: Master Your Camera’s Shooting Modes

Later in part 2 of this photography basics series, we learned about aperture, ISO, and shutter speed.  Now, you need to learn how to apply these settings on your camera to take advantage of your new-found nuggets of knowledge.  I’ll try to struggle through writing this, but my wife has me on a vegetarian diet right now, and just the mention of nuggets makes me hungry.  Anyway…

The Great Flaw of Shooting “Icon Modes” on Your Camera


Icon modes highlighted in red.
Whenever I teach shooting modes, I always get the same question from members of my class, so I’m going to attempt to deal with that one right off the bat.  The question is: why do I need to learn how to set my camera’s settings manually when my camera already has built-in modes for sports, portraits, landscapes, etc?  (These are, by the way, referred to by photographers as the icon modes because they have icons of the shooting situation on the mode dial).
Again, an example will help to explain why these icon modes won’t work for those who want to become a “real” photographer.
With your new photography skills and your new fancy camera, your family members nominate you the official photographer at your family reunion.  It comes time to take the giant group picture with over 60 people in it (including your Uncle Bob who really shouldn’t have worn that ugly Hawaiian shirt).  What mode do you set the camera to?  The little portrait icon, because it’s a portrait!  But there is a problem… a really big problem.  The portrait mode on your camera automatically makes the aperture go really low, because it thinks you want shallow depth-of-field in your portrait.  But in this instance, it’s such a large group of people that you need full depth-of-field so that the people in the back aren’t out of focus.  The camera doesn’t know your intentions with this portrait, so half of the group looks blurry.
And thus we see why the little automatic icon modes (the landscape, portrait, sports modes, etc), simply will not work for photographers who want to learn to take professional-quality photos.

What are Creative Modes?


Creative modes highlighted in yellow.
The Creative Modes on your camera are Program, Aperture Priority, Shutter Priority, and Manual Mode.  On most cameras, they are marked “P, A, S, M.”  These stand for “Program Mode, Aperture priority, Shutter Priority, and Manual Mode.”
If you use a Canon DSLR, then you’ll see that your camera company likes to feel “special” by changing up those names.  Canon cameras will show “P, Av, Tv, M” for the same exact modes.  ”Av” is Canon’s version of Aperture Priority, and “Tv” is Canon’s version of Shutter Priority.
It may feel a little bit intimidating to move to these creative modes on your camera, but I’ll walk you step-by-step through each of the creative modes, how to use them, and what they do.

Program Mode (P)

Just trust me on this one–you don’t want to use it–ever.
But just in case you’re curious, program mode usually (it is slightly different on each camera model) sets the aperture and the shutter speed for you, and allows the photographer to set the white balance, ISO, and flash.
This mode is not a great choice for serious photographers because you can’t set the shutter speed to make sure the picture isn’t blurry, or the aperture to control the depth-of-field.

 Aperture Priority Mode (“A” on most cameras, “Av” on Canon)

I’d love to see you use aperture priority for 95% of your shooting for the next several months.  It is the mode that most hobbyist photographers and even many many pro photographers shoot in most of the time.
When you shoot aperture priority mode, you set the aperture (the f-stop) and also the ISO.  The camera will then set a shutter speed for you so that the picture is properly exposed.
Aperture priority mode is powerful because it is amazingly simple to use, and still allows the photographer a lot of creative choice.  In fact, most competent photographers use aperture priority mode every single day.
Suppose you’re shooting friends and family at a party.  The background is really busy with people and things around the house, so you decide you want a blurry background in the photo (shallow depth-of-field).  To achieve this, you set the camera to f/3.5 which is a low aperture and which will blur out the background.  The first picture you take is of a person sitting on the couch next to a lamp.  The lamp is bright, so you want a fast shutter speed to get the correct exposure since your aperture is wide open.  Using aperture priority mode, the camera would automatically set that shutter speed for you.  Then, you want to take a picture of someone in a darker corner of the room.  You wouldn’t have to fiddle with camera settings at all, because the camera will automatically see that it is dark and choose a slower shutter speed.  All the while, you’re able to keep the aperture set to use creative depth-of-field.
If I could only teach you one thing in this photography basics series, it would be to set your camera in aperture priority for the next six months.  When you want full depth-of-field, choose a high f-stop (aperture).  When you want shallow depth of field, choose a lower f-stop.  Your pictures will DRAMATICALLY improve when you learn to control the depth-of-field. 

Shutter Priority Mode (“S” on most cameras, or “Tv” on Canon cameras)

Shutter priority mode sounds very useful, but the truth is that I have never found a professional photographer who uses it.  It is a bit difficult to explain why that is.
At first blush, it sounds convenient to have a mode where you could choose the shutter speed and ISO and let the camera choose the aperture for you.  For example, when shooting a school basketball game, you might think you’d want shutter priority mode because you could set the shutter speed fast enough for the quick-moving sports situation.
However, you might be surprised to learn that nearly all professional sports photographers I’ve worked with shoot in aperture priority mode.  Why?  Because the depth-of-field is key.  We want to control depth-of-field in our sports pictures and we just keep an eye on the shutter speed to make sure the camera isn’t picking one that is too low.  If it does, then we boost the ISO so that the camera will chose a faster shutter speed.

Manual Mode (“M”)

When I was 16 and drove a car for the first time, my teacher took me to a large parking lot.  He asked me to floor it as fast as I possibly could across the parking lot.  This was my first time driving!  So, I went for it.  I felt like I was FLYING!  Then, he told me half way across the parking lot to look at the speedometer.  I was only going 10 miles per hour (16 kilometers)!  The point is, the first time you try anything, it feels intimidating and like you’re out of control.
The first time any of my students use a camera in manual mode, I can see them terrified to try it out.  However, shooting in manual mode really isn’t as difficult as it may seem.  To understand manual mode, the example below will be helpful.

Manual mode.  Aperture: f/18.  Shutter speed: 1/60.  ISO 100.  Nikon 10-24mm lens.  Nikon D7000 camera.
I took the picture above while at a photography conference in San Francisco.  In a situation like this, the bridge isn’t going anywhere, the bay isn’t going anywhere, the chain in front of me wasn’t going anywhere… I had a captive audience to say the least.  In situations like this, I always use manual mode.  I then set my shutter speed to 1/100.  I set my ISO to 100 because I wanted no noise in the picture and I knew if I needed more light, I could just slow down the shutter speed.
After taking the picture with the settings above, I realized that the picture was coming out a bit too dark with 1/100 shutter speed.  So, I slowed it down to 1/60 and it looked just how I wanted.
The point is that, eventually, you’ll find yourself wanting to shoot in manual mode for situations where you aren’t rushed to get the shot.  If you’re shooting sports, outdoor portraits, or other things, then aperture priority is simpler and faster than shooting in manual mode.
But since you’re still learning, the best option for the next few months is to get comfortable shooting in aperture priority mode 100% of the time.
In the next lesson in this series, you’re going to learn how you can dramatically improve your pictures by using creative compositions.  We’re past most of the technical stuff for now.

Source : improvephotography-basic#3

Photography Basics #2: Aperture, Shutter speed, and ISO

Photography Basics #2: Aperture, Shutter speed, and ISO

From the example of the sunset picture in installment #1 of this photography basics series, you have learned the importance of taking full control over the exposure on your camera.  Now, it’s time to dig into your camera and learn the three most basic tools available to you in controlling the exposure.
Those tools are shutter speed, aperture, and ISO.  After I explain what each one does, I’ll explain why we need three separate tools to control the brightness or darkness of the photo.

Aperture

close up photo of an aperture in a camera lens
A small aperture in a camera lens.
The aperture is a small set of blades in the lens that controls how much light will enter the camera.  The blades create a octagonal shape that can be widened (we photogs call it shooting “wide open”), or closed down to a small hole.  Obviously, if you shoot with the aperture wide open, then more light is allowed into the camera than if the aperture is closed down to only allow a tiny hole of light to enter the camera.
So suppose you take a picture that is too bright.  How do you fix it?  Simply choose a smaller aperture.  Simple! Aperture sizes are measured by f-stops.  A high f-stop like f-22 means that the aperture hole is quite small, and a low f-stop like f/3.5 means that the aperture is wide open.
Let’s test your knowledge to make sure you have it down.  If you take a picture and it’s too dark at f/5.6, would you choose a lower f-stop number or a higher one?  Yep!  You’d choose a lower f-stop number, which opens up the aperture to let in more light. The size of the aperture controls more than the brightness or darkness of the picture, though.
The aperture also controls the depth-of-field.  Depth-of-field is how much of the picture is sharp, and how much is blurry.  If you want to take a picture of a person and have the background be blurry, you’d use shallow depth of field.  If you want to take a picture of a sweeping mountain vista, you’d want to use a small aperture size (high f-stop number) so that the entire scene is in sharp focus. If you, like me, are more of a visual learner, then I think this graphic will help solidify the information about aperture.  Take a minute and make sure you understand this info before moving on.
Graphic explanation of the aperture for photography basics learners
.

Shutter Speed

The shutter is a small “curtain” in the camera that quickly rolls over the image sensor (the digital version of film) and allows light to shine onto the imaging sensor for a fraction of a second. The longer the shutter allows light to shine onto the image sensor, the brighter the picture since more light is gathered.  A darker picture is produced when the shutter moves very quickly and only allows light to touch the imaging sensor for a tiny fraction of a second. The duration that the shutter allows light onto the image sensor is called the shutter speed, and is measured in fractions of a second.  So a shuttedr speed of 1/2 of a second will allow more light to touch the image sensor and will produce a brighter picture than a shutter speed of 1/200 of a second. So if you’re taking a picture an it is too dark, you could use a slower shutter speed to allow the camera to gather more light.
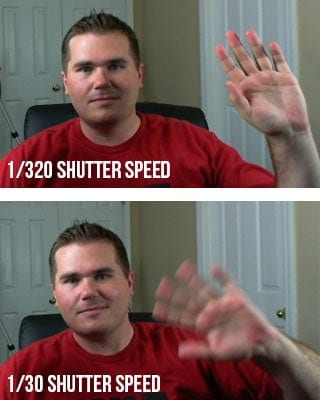
Example picture of motion blur caused by too slow of a shutter speed.
That’s me! Typing away on this article from my studio in Caldwell, Idaho.
Just as the aperture affects the exposure as well as the depth-of field, the shutter affects more than just the exposure.  The shutter speed is also principally responsible for controlling the amount of blur in a picture. If you think about it, it makes sense that the shutter speed controls how much blur is in the picture.
Imagine me sitting here at my computer desk waving to you (you don’t have to imagine very hard if you just look at the picture on the right).If you take a picture of me with a shutter speed of 1/30th of a second, then my hand will have moved in the time that the camera is recording the picture.  To get rid of the blur, you need to increase the shutter speed to around 1/320th of a second.  At this speed, my hand is still moving, but the camera takes the picture so fast that my hand travels only such a small distance that it is not noticeable in the picture.
Graphic explaining the effects of changing the shutter speed
.

ISO

The funny thing about ISO is that it is an acronym, but nobody really knows what it stands for.  It is always just called ISO even though it really stands for International Organization for Standardization.  Every once in a while, you’ll hear an older photographer pronounce it “I-so”, but almost everyone pronounces it “I.S.O.” The ISO controls the exposure by using software in the camera to make it extra sensitive to light.
A high ISO such as ISO 1,600 will produce a brighter picture than a lower ISO such as ISO 100. The drawback to increasing the ISO is that it makes the picture noisier.  Digital noise is apparent when a photo looks grainy. Have you ever taken a picture at night with your cell phone or your pocket camera, and noticed that it looks really grainy?  That is because the camera tried to compensate for the dark scene by choosing a high ISO, which causes more grain.
What constitutes a “high” ISO is constantly changing.  Camera companies are constantly improving the ability of cameras to use high ISOs without as much grain.  A few years ago, only the highest-end pro DSLR cameras could achieve 2,000 ISO, and now even entry-level DSLR cameras can shoot at this level.  Since each camera is different, you would do well to do a few tests with your camera to see how high of an ISO you can shoot at without making the image overly grainy.
A graphic explanation of how ISO settings work in basic photography
.

Putting It All Together

A ram attempting to mate with a ewe bighorn sheep in Yellowstone.
Bighorn sheep in Yellowstone National Park
I know exactly what you’re thinking: “Why do I need three tools to control the exposure!?!?  Wouldn’t one suffice?”  The answer is no, and I’ll explain why with an example. In January 2012, I took a trip to my favorite place on the planet to take pictures–Yellowstone National Park.  My guide informed us that the bighorn sheep in the park were dying off very quickly due to whooping cough, so I worked hard that week to capture pictures of the last few sheep in that area of the park. Around 9AM on a cloudy day, I found a small group of bighorn sheep and started photographing them with a long 600mm lens.  The early hour and clouded sky made the situation quite dark for shooting.
The lens I was working with (which costs $11,000–don’t they know I’ve gotta send my kids to college?)… Anyway, it had a maximum aperture size of f/4.  So I set my aperture at f/4 to gather as much light as possible.  This also impacted the depth-of field to blur out the rocks behind the bighorn sheep. Next, I set my shutter speed.  I wanted to capture action in the photo, so I set my camera to 1/1000th of a second shutter speed.  I knew that this fast of a shutter speed would prevent any motion blur from the sheep running on the mountain side. Then, I took a picture.  WAAAY too dark!  I couldn’t compromise my shutter speed or aperture, so I knew I needed to use the third player in the exposure triangle–the ISO.
I played around with my ISO and found that if I increased it to ISO 640, it made the picture bright enough to take the picture without making it overly grainy. Yahtzee!  This combination of shutter speed, aperture, and ISO worked out perfectly.  Now can you see why you need to know how to shutter, aperture, AND ISO, and know how to set them independently on your camera?
In part 3 of the Photo Basics Series, I’m going to teach you how to set these on your camera.

Source : improvephotography-basic#2

Photography Basics #1: Introduction and Exposure

Photography Basics #1: Introduction and Exposure

I’m so glad you found your way onto my Photography Basics series.  I have taught the basics of photography to millions of photographers around the world through Improve Photography, so I know just exactly how difficult it can seem to learn the basics of photography.
My goal is to make this Photography Basics series the absolute simplest way to learn the basics of photography.
I hope you’ll love this series because of what you learn here, and I hope you’ll join the Improve Photography community after you get your feet wet with the photo basics.  Let’s get going.

Basic Equipment You’ll Need

You can do photography with even the simplest of cameras, but the principles that I’d like to teach are for people who want to learn to use a DSLR camera, a micro four-thirds camera, or at least a camera that allows the photographer to adjust the shutter speed, aperture, and ISO.  Even some pocket cameras have this functionality.
Now that you have your camera, it is time to learn exposure.

Exposure–the most basic element of photography

When photographers talk about “exposure,” we simply mean the brightness or darkness of a photo.  It seems simple enough to take a photo that is correctly exposed (has the proper brightness or darkness), but in reality it can be quite the trick.
If you’re reading this Photo Basics series, it probably means that you currently shoot on the “Green mode” of your camera–or the automatic setting.  That means the camera entirely controls the exposure of the picture.  When you shoot on automatic mode, your camera selects an aperture setting, an ISO setting, a shutter speed, and a host of other settings for you.
Automatic can be handy, but it also seriously limits your creative ability to make a beautiful picture.
Want proof that automatic isn’t the best way to shoot?  Check out the picture below.  On the left, the picture was taken entirely in automatic mode on a Canon Rebel DSLR.  That might look okay to you… until you see the picture on the right.  Same sunset.  Same camera.  The pictures were taken only seconds apart.  The difference?  The picture on the right was taken using manual exposure.
exposure example
The only difference between these two pictures is that one was shot with automatic exposure, and the other was shot using creative exposure.
Which photo do you prefer?  Probably the picture on the right!  By choosing a creatively dark exposure, the rich colors in the sunset were allowed to shine through.
However, technically, the photo on the left is “correct,” and the photo on the right is “incorrect.”  The camera saw through the lens and tried to expose the bird so that it wouldn’t become a shadow.  To me, the photo was not about exposing the bird properly, but exposing the sunset properly.  The bird was just a nice shape to include in the foreground.  This is exactly why you must learn exposure–because sometimes the “scientifically correct” exposure is not the best exposure to make the photo look how you want it to.

What’s next?

Now that you understand why it is so important to take control over the exposure, let’s move on to lesson #2 where we’ll learn all about shutter, aperture and ISO–which are the tools you need to control the exposure.  Keep reading for the next 10 or 15 minutes and you’ll already understand the basics of how to shoot in manual mode on your camera.  I promise shooting in manual mode isn’t nearly as scary as you might think.

Source : improvephotography-basic#1